Installing and using the Mailchimp for WordPress Pro plugin is easy.
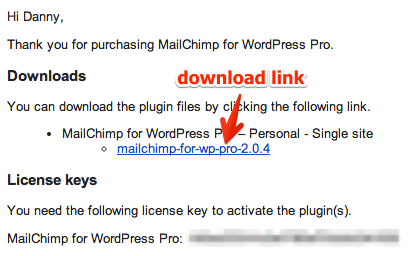
After your payment is completed you will receive an email with a download link and a license key, looking somewhat like this. You can download the Pro plugin files using the download link.

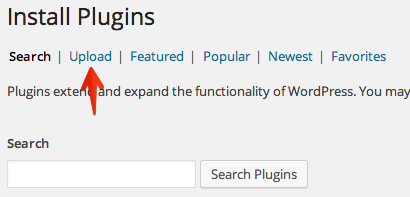
Download the .zip file called mailchimp-for-wp-vx.x.x and login to your WordPress admin panel. Extracting the .zip file is not necessary. Go to “Plugins > Add New” and click on the “Upload” link at the top of the screen.
Note for Safari for Mac users for which the .zip file automatically extracts after downloading, either go to Preferences > General and uncheck “open safe files after downloading” or simply re-compress the files to a .zip again.

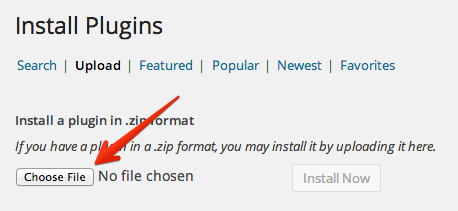
You’ll be presented with the following screen where can you browse your computer for the .zip file you just downloaded. Press “Install now” and the Mailchimp for WP Pro plugin will be installed.

After successfully installing the plugin, click “Activate plugin“.

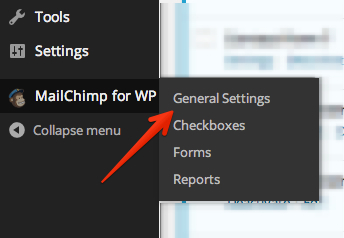
Now that the plugin is active, you should have a “Mailchimp for WP” item in your menu that will take you to the plugin settings screen.

Once you go there, you will be presented with a form that allows you to enter your Mailchimp API key and another form to enter your “license key”. To enable automatic plugin updates, you will need to activate your license using the license key you received after purchasing the plugin.
Copy the license key from your purchase email and click “Save Changes“. In most cases, the plugin will automatically detect the new license and will activate it remotely. In other cases, you can use the “Activate License” button to activate your license.
Note: while the plugin will function without an activated license, you will need it to receive plugin updates. With an active license you will receive plugin updates just like any other (regular) WordPress plugin.

Now, the plugin is fully installed and ready to receive future updates. Play around with the various settings, sit back, relax and watch your lists grow.![]()